 Follow
Building a solar powered charger to fuel small appliances can be structured by using some basic equipments. Increased use of solar panels has made its availability easier. Solar panels are available in all possible sizes from bigger to a smaller one and that too at affordable prices.
It is not a very complicated procedure to structure a solar powered charger.

Here are the steps to make a solar powered charger:
1. Collection of the required tools
There are certain specific tools which are required for making a solar powered charger. So the first step is collection of the required tools. The required tools include AA batteries, Battery holders, a USB extension a/a cable, electrical tape, glue gun or tape to hold the pieces in place,terminal strip or soldering iron, blocking diode, a drill, a 6 volt solar panel.
2. Selection of the diode
Standard diodes drop the voltage by 0.6 V, while the Schottky diode drops it by 0.2 V which can be a deciding factor in whether the charger works or not. So it’s better to choose a standard diode which will ensure quality of the functioning of the charger.
3. Cutting the USB cable
To build the kit, cut the USB cable at the end which has the jack and remove everything except the red and black wire. This cable will be used in constructing the circuit.
4. Testing the solar collectors
Check the solar collectors before connecting it to the circuit to be sure that it is working. It should yield the output of 2 volt inside the room and 2.5 volt in bright sunlight.
5. Soldering
The next step is soldering to make a circuit. Solder the red wire of the cable to the diode and then the diode to the red wire from the solar panel. In the next step solder the black wire from the solar panel to the cable. This completes the step of soldering. Soldering creates a serial connection which adds the voltages together, giving an output between 4 and 5 V, which is the required voltage for operation of a standard charger.
6. Drilling
The next step is drilling. Drill a hole for the cables, to make it pass through the solar panel. This completes the step of drilling.
7. Finalizing the setup
The next step involves the fitting of the components of the solar charger into the project box. It should be done with caution as recklessness in final step could disturb the whole model.
8. Testing the finalized solar charger
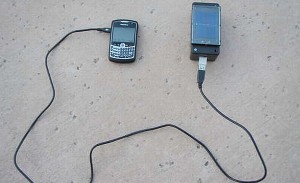
Connect any one of the gadgets with minimal power requirement to the finalized solar charger to test it out. Ensure that solar panels are exposed to bright light and allow the charger to charge the gadget. It’s better to turn off the gadget while charging.
Caution while using solar charger
1. Place the charger in an open area where the solar panel gets enough light to convert it into electrical energy. If the solar panel does not gets ample light, it will not function appropriately.
2. Don’t connect the charger to a gadget with higher energy demands as solar charger has its own limit as it should be used in accordance with the outermost capacity.
3. Don’t cross connect the charger to any other source of electric charge as it may damage the charger. It should be ensured that the charger is properly connected to the gadget .
4. Use the charger to charge the gadgets in switched off condition. It will increase the life of the solar panel.
5. Give appropriate time to the solar charger to charge the connected gadget as it depends on the intesity of light hitting the solar panel.