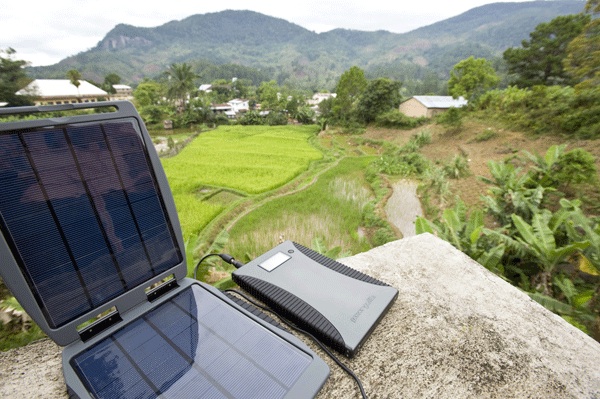
This is a project where you will create means to provide power to electronic gadgets like laptop with the help of solar energy. These kinds of gadgets are portable, but the chargers can’t be carried along with us in the outdoors. Suppose you are in the outdoors and you don’t have the charger with you and at the same time it is quite urgent for you to use it. How will it be possible? In this kind of situations, solar powered charger comes handy.
Difficulty level: Easy
Time required: 30 minutes maximum
Resources required
(a) Solar cells
(b) Power output
(c) Panels for power produce
(d) Inverter (optional)
(e) Wires
(f) Solar charger
(g) Lawnmower battery
(h) 12 volt car inverter
(i) 12 volt socket
Estimate cost: The laptop charger will cost you around $48 while the rest will cost a bit high that might vary between $750 and $700.
Instructions
1. Collect information on solar cells with regard to their usages along with the systems of the panel designs as you need to start from the basics to come to a point. Thus, in this case, you might need two 18 watt solar panels.
2. Mount the solar cells inside a house-type shelter and must be sealed in order to get it prevented from the dust particles and the formation of condensation as it will decrease the productivity of the power.
3. It is better to ascertain your requirements for power on time. Look at the label on the device. It will tell you the required watts and voltage for charging the device of yours.
4. Build a device that will produce 12 volts.
5. For the series and parallel wiring case, get the ‘+’ of one of the solar cells to the ‘-’ of the other solar cell. Repeat this act as many times required because your volt will be equal to the number of the solar cells fastened jointly. Your panel will produce 12 volts and 10 watts while your solar cells will produce 5 volts and 10 watts.
6. In order to get an increment of the watts, you can fasten the panels together with the help of parallel wiring. In this, you need to fasten the wires of ‘+’ category from other panels jointly and the wires belonging to ‘-’ category from other panels. Make sure that you don’t bind up the negative and positive panels or else you may short them out.
7. Tying up two panels together will give an output of 12 volts and 20 watts. Thus, an increment in the watts is seen. Using this technique, you actually can produce a desired output as per your specifications.
8. Add the inverter to this stuff. It will convert DC to AC and will supply a clean sine wave. This will be helpful regarding the operation of the solar power laptop charger.
9. The last and the most important thing is that after using it, do not forget to preserve the charger well as it can stop working if not taken care properly as it is quite fragile.
Frequently asked questions
1. Is the cost incurred fixed to $750?
Ans. No, it depends on the market. You can get it at $650 too.
2. Is this harmful for the laptop as we are using as a substitute of the 12V chargers?
Ans. No, it is not. In turn, it is quite eco-friendly.
3. How much does the charge last?
Ans. It lasts up to 20 hours maximum.
4. For how many hours do I have to put in on charge?
Ans. For around 5 to 6 hours continuously.
Quick tips
1. Do not forget to get a voltage regulator (use it if required).
2. Do not forget to find out the charging volt that it requires.
3. Try to figure out the amplifiers required or the fraction thereof.
4. Make sure that the design made is regulatory protecting the laptop of yours.
5. Make arrangements for the sensing wires.
6. Ensure that the division of the charger matches well with the requirements of the battery that you are using for the project.
Things to watch out for
1. Solar cells output very lethal voltages. It is better to know what you are doing and use small cells instead.
2. Using large cells can take your life away for which nobody will be responsible except you.
Via: ecofriend

 Follow