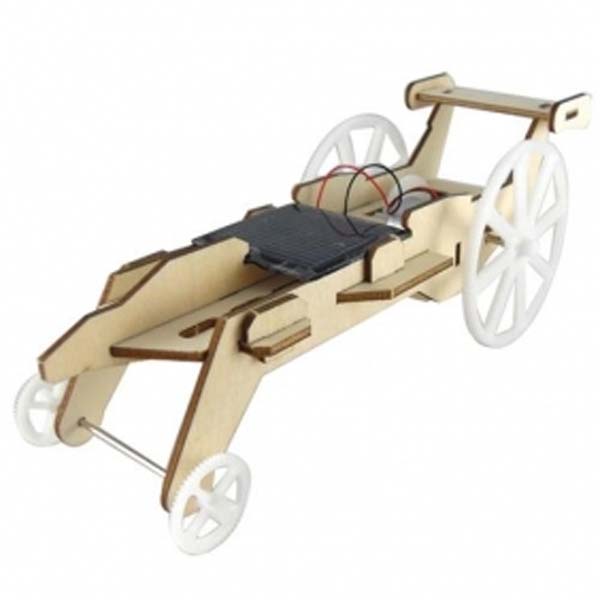
You must have heard about various solar powered things; a solar cooker, a solar heater, a solar pool heater and the count goes on with this rising demand for solar powered stuffs. How about making a solar car? A Solar RC Car!! It sounds interesting. Making it would be far more fun and interesting as well. All you need is a Style Pan Car so that it accommodates a solar panel. This will reduce the cost in making this car. Before starting with the procedure plan, we need to arrange the materials required to get the car done. You can get most of the things from a nearby hobby shop in your locality.

Difficulty Level: Moderately Challenging (May require expertise in few areas)
Time required: One or two weeks
Resources required
1. Solar cells.
2. Associated RC12L or RC10L style car
3. A motor
4. Foam sheets
5. Polyurethane Glue or Foam safe glue
6. 1/16 inch Piano wire and Wheel Collars
7. 6 feet stranded of wire of 18ga size
8. 1/8 inch Birch plywood
9. A Radio System with Servo
10. Screws, bolts, nuts and hobby parts
11. 8Amp rated controller
12. Servo Extension
Estimate Cost:
Making a solar car would cost you nearly $400.
Instructions
1: Building the chassis
Design the car as such that the chassis operates as the solar panel. Attach everything to the panel to utilize it as a car. If you have small foam sheets then attach two sheets together to make it in to a larger one.
You need 4 cutouts made in back side of the foam of the car. Use the first 2 cuts for placing the wheels. For wheels of 2.4” make cutouts of 3”X3”. Note that these cutouts are squared and place at equal distance and side in the foam. The third cutout is for the servo; its size may differ as per the size of servo. Make the cutout as such that the servo horn is place right in the center of the car. Now the fourth and the final cutout is placed on the T-Plate. Make the cutout sufficiently long so that it can accommodate the shock mount as well as the T-Plate.
If you to wish to direct the servo wire from within the car, create a slot for the wire.
Start making pieces of plywood to mount the parts of RC10L on. Take two pieces for making the A- arm suspension mounts in the front. Use one large piece to mount the shock and the T-Plate and the last piece to mount the servo. Make sure that the gluing surface is large enough that ply wood doesn’t get ripped off from the foam when under stress. Use double stick tape to attach the plywood pieces to graphite chassis in order to ensure the mounting holes of RC10L parts were accurate.
Now check if all the parts of RC10L and servo fit to the plywood pieces and later on check if these pieces do fit into the cavities of the cutouts. If yes, then glue them in to place. Use some weights to avoid the polyurethane glue from escalating thereby preventing the shifting of the location of the piece.
2: Building the power pod
Firstly put the suitable spur gear on the wheel assembly and later on fix the motor to the mounting bulkhead with the cross brace that comes along with the motor. Now join the Pinion near the motor shaft, line up the gear and set the appropriate gear mesh.
If the motor is placed properly now prepare the motor controller. The power input wires requires a male connector to plug into the solar panel. If you wish to install a capacitor, then the male power connector would be a perfect to solder the leads of the capacitor. Now join the Motor Pod, the motor controller and connect to motor leads. Now place the RX or the Radio Receiver using a servo mounting tape.
3: Building the front wheel assemblies
Now comes the most difficult part, i.e. connecting the wheel assemblies and the steering servo. You need to use your imagination a bit. You can take piano wires, sharpened and poked the wire through the tunnel from the steering wheel in the foam to the servo horn. You can also widen the hole if required. Measure the length from the servo center to the wheels’ connecting point and add some extra inches to it. Take a wire of this length and bend the starting ½ “in to L shape. Now insert this wire in to the tunnel with the L shaped end joining the servo. Now connect this L part to the servo horn. Once done, now position the Wheels straight. You can trim off the extra wires. But make sure to keep an extra ½ “for any error.
4: Pre-finalization testing and assembly
This is a very important step and do not think of skipping it. Join the parts of RC10L to the chassis and then the T-plate as well as Shock and Mount to the mount in the Chassis. Set the Tweak Screws in order to prevent the plate from rocking.
Now attach the Power Pod and fix the Shock to the upper Pod and plug the servo extension to RX. Insert the wheel assemblies and connect the steering linkages to the steering block and servo.
Now you can test drive you solar car. But for the time being make use of batteries instead of the solar panel. Drive the car in various driving situations. One done and if everything is perfect you can paint or coat the foam. Use a coating that is safe to be used on foam.
5: Finalization and solar panel assembly.
Once done with the coating, you can now assemble the panel. Before placing the panel you can place mock solar cells made of card stock to ensure fits on the poster board. Arrange the solar cells into strings fitting the mock layout. It may require soldering to be done. Once assembled, check the Voltage of the string to ensure proper connections.
Make use of rubber cement to fix the solar strings to the car. Connect each string to the next solar string by using Insulated wire or jumper wires. Now fix a female plug to the stranded wires to complete the final connection from the panel to the Power Pod. Now solder all the stranded wires to the panel’s positive and negative. Again check the voltage to make sure proper connections.
Frequently asked questions:
What kind of connectors do you need for the motor?
The motor leads will need a connector of same kind as found on the motor. Some motors come with connectors.
Quick tips
- While test driving the car, you can check the functioning of the motor pod using a battery of voltage similar to that of solar panel.
- While attaching the POWER POD to the T-plate use the Outer screw holes, not the center ones.
- Solar cells are very fragile hence you need to be careful. And keep this as the last step.
Things to watch out for
- While fixing the parts, it is recommended to glue one piece at a time as glue takes time to set. This step may take few hours or even days. But make sure everything is perfectly placed.
- Test the car in various driving situations, such as full speed, hard starts, sweeping corners, slow starts as well as switch back corners. Ensure the wheel alignment is good and there is minimal of tire warring.
Source: ecofriend

 Follow